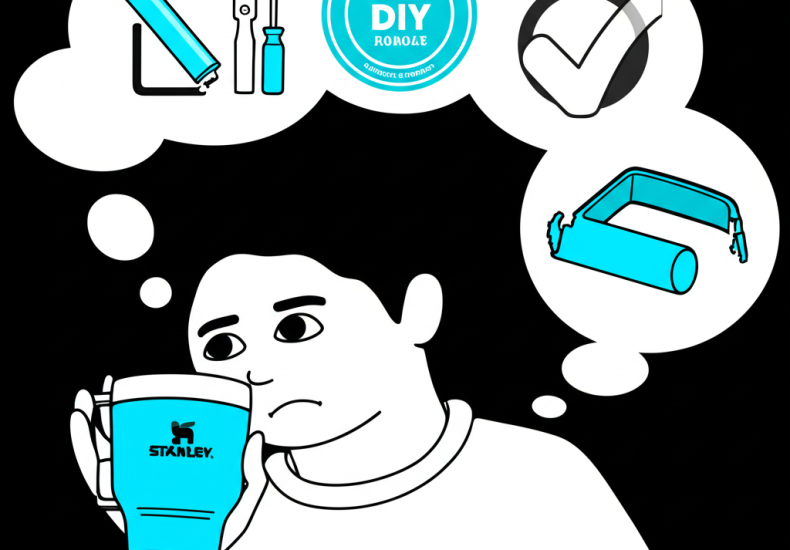
How to Fix a Broken Stanley Cup Handle: DIY, Warranty, and Replacement Guide
Diagnosing Your Stanley Handle Break: What’s the Damage?
Spotting a broken handle on your go-to Stanley tumbler can be more than just inconvenient—it can feel like a personal setback. After all, these tumblers are built to withstand the rigors of daily life, from morning commutes to weekend hikes. But even the toughest gear can fail. The good news? A damaged handle doesn’t automatically mean retirement for your favorite hydration companion. Before you toss it aside, take a closer look. Understanding exactly what’s wrong is the critical first step toward deciding whether to fix it, replace it, or file a claim. This guide walks you through identifying the type of damage, so you can choose the best path forward with confidence.
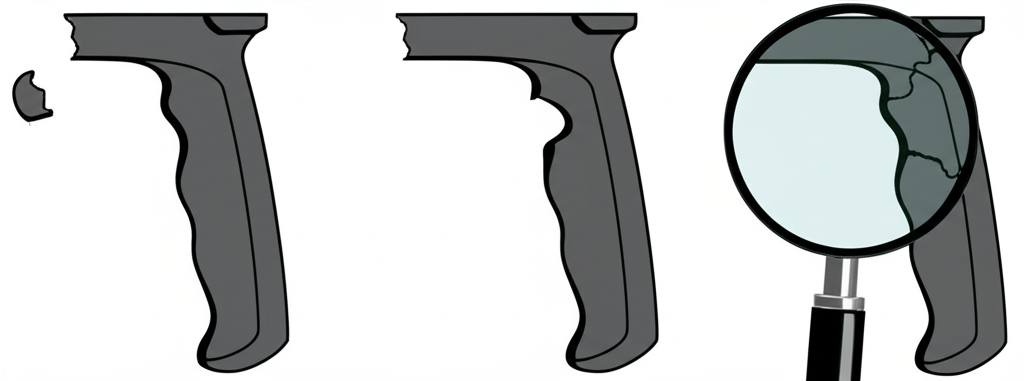
Common Breakage Points and Their Implications
Stanley cup handles typically fail in predictable ways, and knowing where to look helps determine your next move. Grab your cup and inspect it closely under good lighting.
- Fully Detached Handle: The handle has separated completely, usually at the top or bottom mount. This often happens after a hard drop, especially when the cup is full. While dramatic, it’s often repairable with the right adhesive.
- Wobbly or Loose Handle: The handle still hangs on but shifts when you lift the cup. This usually points to worn-out screw threads, loose internal pins, or degraded plastic around the mounting points.
- Visible Cracks in the Plastic: Fine lines or deeper fractures in the handle body are early warning signs. These can spread over time, eventually leading to a full break if ignored.
- Stripped or Missing Screws: If the screws turn without tightening, or if they’ve fallen out entirely, the structural integrity is compromised. This is common with repeated assembly and disassembly or over-tightening.
Pinpointing the issue helps you decide whether a quick fix will suffice, or if it’s time to reach out to Stanley’s customer support. The sooner you act, the better your chances of saving the cup.
DIY Fixes for Your Broken Stanley Cup Handle
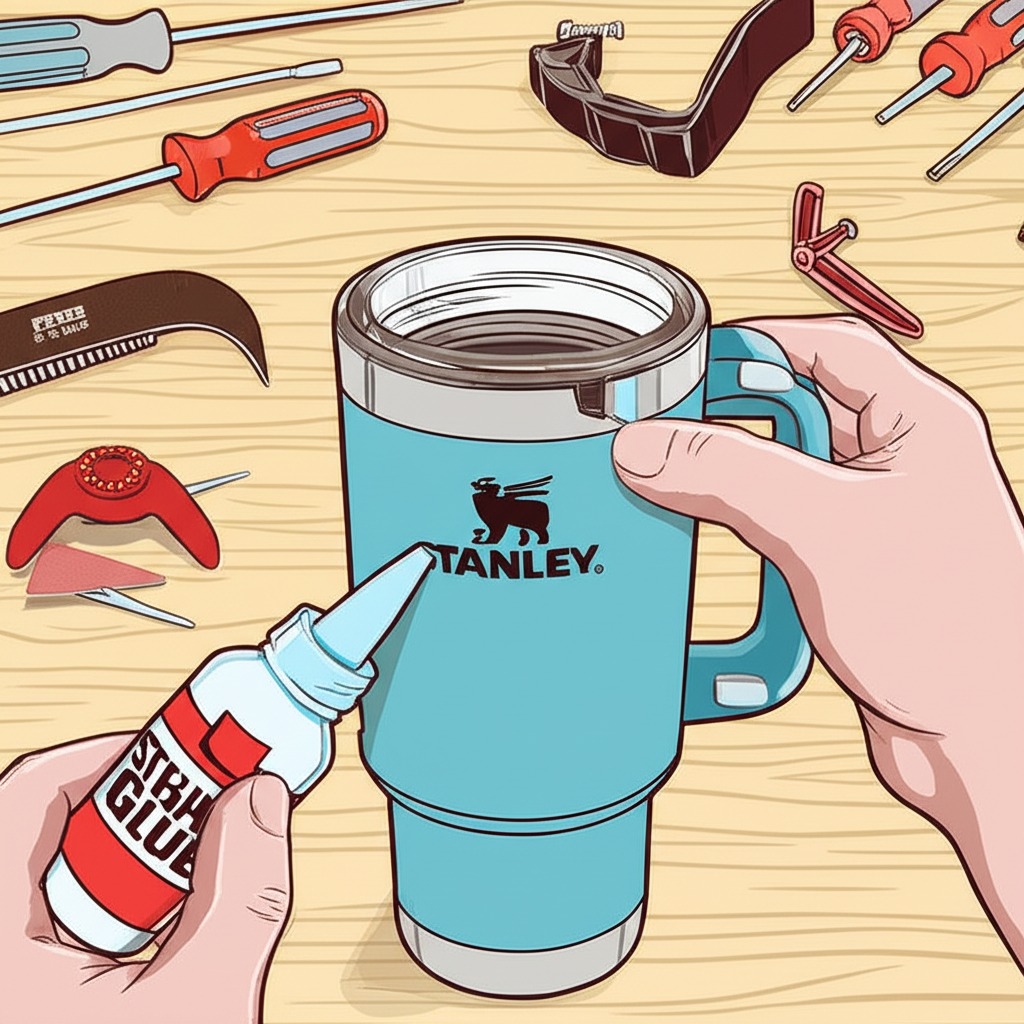
If the damage isn’t catastrophic, a well-executed DIY repair can get your Stanley back in action—often for just a few dollars and a little patience. These fixes work best for clean breaks, minor cracks, or loose fittings. The key is preparation, the right materials, and giving adhesives enough time to set.
Adhesive Solutions: Super Glue vs. Epoxy
When plastic breaks, the go-to solution is a strong bonding agent. But not all glues are created equal. Choosing the right one can mean the difference between a lasting fix and a temporary patch.
Super Glue (Cyanoacrylate) works well for small cracks or clean breaks where the pieces fit snugly together. It bonds fast—often in under a minute—and requires minimal prep. However, it’s brittle and doesn’t handle stress well over time, making it less ideal for handles that bear heavy loads.
For most handle repairs, two-part epoxy is the superior choice. It forms a durable, flexible bond that fills gaps and resists impact. Once cured, it can withstand the weight of a full tumbler and daily wear. Brands like J-B Weld or Loctite Epoxy Plastic Bonder are popular for this type of repair.
Step-by-Step Epoxy Repair:
- Clean the area: Wipe both broken surfaces with isopropyl alcohol to remove oils and debris.
- Roughen the edges: Lightly sand the broken surfaces with fine-grit sandpaper to help the epoxy grip better.
- Mix the epoxy: Follow the manufacturer’s instructions to combine resin and hardener evenly.
- Apply and join: Coat both surfaces, press them together, and hold in place.
- Clamp and cure: Use small clamps, rubber bands, or strong tape to keep everything aligned. Let it cure for at least 24 hours—longer if possible—before testing.
Reinforcing Loose Handles: Screws, Washers, and Creative Solutions
If the handle is still attached but shaky, the problem is likely mechanical rather than structural. Start by tightening any visible screws with a precision screwdriver. Be gentle—plastic threads strip easily.
If the screws spin freely, the threads are stripped. Here are a few ways to restore grip:
- Fill the hole: Mix a small amount of epoxy and pack it into the stripped screw hole. Let it set, then drill a shallow pilot hole and reinsert the screw.
- Use a toothpick or matchstick: Insert a small wooden sliver into the hole with a drop of glue. Break it off flush and reinstall the screw. This gives the threads something to bite into.
- Add a washer: Place a small metal or nylon washer under the screw head to distribute pressure and reduce strain on the plastic.
Some models use internal pins instead of screws. If a pin is loose, you can try reseating it with a light tap from a rubber mallet. A tiny dab of super glue at the base can help keep it in place—if it’s not meant to be removable.
Temporary Fixes for Urgent Situations
Sometimes you need a stopgap solution—maybe you’re on a trip or waiting for parts. While not long-term answers, these methods can keep your cup functional for a few days.
- Duct tape or heavy-duty electrical tape: Wrap multiple layers around the break or mounting area for added stability.
- Zip ties: Thread one or two heavy-duty zip ties through the handle and around the cup body. Tighten firmly for a surprisingly sturdy hold.
- Paracord wrap: A tightly woven paracord handle not only reinforces the existing structure but adds a custom look and better grip. It’s a favorite among outdoor enthusiasts.
Remember, these are emergency measures. Transition to a permanent fix as soon as you can.
Stanley’s Warranty Program: Your Official Path to Resolution
One of the biggest reasons Stanley has such a loyal following is its “Built For Life” warranty. Unlike most brands that offer limited-time coverage, Stanley stands behind its products indefinitely—as long as the failure is due to a defect in materials or craftsmanship.
This means if your handle breaks under normal use without obvious impact, you may qualify for a free replacement. The warranty does not cover damage from drops, misuse, or normal wear and tear, so be honest about how the break occurred. According to Stanley’s official policy, “Our warranty covers manufacturing defects, lost parts, and unsatisfactory thermal performance, but does not cover normal wear and tear, improper use or cleaning, or natural breakdown of colors and materials over extended time and use.” (Stanley 1913 Warranty Page)
Step-by-Step Warranty Claim Submission
Filing a claim is straightforward, but attention to detail improves your chances of approval.
- Collect evidence: Take clear, well-lit photos of the broken handle from multiple angles. Include a shot of the entire cup, and if possible, the model name or serial number.
- Find your model info: Note the product line (e.g., Quencher H2.0, Adventure Series) and size. This helps Stanley process your claim faster.
- Check purchase history: While not always required, having a receipt or order confirmation can speed things up, especially if the cup is relatively new.
- Submit online: Visit stanley1913.com, go to the “Contact Us” or “Warranty” section, and fill out the claim form. Be clear and concise—explain that the handle failed during regular use, not due to an accident.
- Attach media: Upload your photos and submit. Keep a copy of your confirmation or claim number for follow-up.
What to Expect: Outcomes and Timelines
Stanley typically reviews claims within a few business days to a week. If approved, you’ll likely receive a replacement of the same or similar model. In rare cases, they may offer a repair kit or store credit.
The entire process—from submission to delivery—usually takes 2 to 4 weeks, depending on stock and shipping location. During holiday seasons or product launches, delays can happen. If your claim is denied, don’t hesitate to reply with additional photos or context. Sometimes a second review leads to a different outcome.
Removing and Replacing Your Stanley Cup Handle
Wondering if you can remove a Stanley cup handle? In most cases, yes—whether you’re repairing, replacing, or upgrading. The method depends on your model, but the process is generally simple with the right tools.
Tools and Techniques for Handle Removal
Start by identifying how the handle is attached. Many Stanley tumblers use one of two systems:
- Screw-mounted handles: Look for small Phillips-head screws at the top and bottom of the handle. Use a precision screwdriver to remove them carefully—these screws are tiny and easy to lose.
- Pin or clip-mounted handles: Some models have hidden fasteners. You’ll see a seam where the handle meets the cup. Use a plastic pry tool or guitar pick to gently separate the pieces. Avoid metal tools to prevent scratching.
If the handle is stuck, a brief burst of warm air from a hairdryer can soften the plastic slightly, making removal easier. Work slowly and evenly around both sides to avoid cracking the housing.
Sourcing a Replacement Handle and Installation Guide
Stanley doesn’t always sell handles separately, but it’s worth checking their official site or contacting customer service directly. If no official part is available, third-party options exist:
- Amazon and Etsy: Search for “Stanley replacement handle” along with your model name. Some sellers offer compatible parts, though quality varies.
- 3D printing: If you’re tech-savvy, custom 3D-printed handles are an emerging option. You’ll need a design file (often available on platforms like Thingiverse) and access to a printer.
- Diy alternatives: Paracord wraps, leather straps, or silicone sleeves can serve as functional and stylish replacements.
Installation Tips:
- Align the new handle with the mounting points.
- For screw-on models, insert screws and tighten gently—don’t force them.
- For pin-style attachments, press firmly until you hear a click, indicating it’s seated properly.
- Test the handle by lifting the cup gently before filling it.
Preventing Future Stanley Handle Breaks
Even the most durable tumblers need a little care. A few smart habits can drastically reduce the risk of handle failure.
- Avoid swinging or dangling: Don’t carry your Stanley by the handle alone, especially when full. Support the base with your other hand to distribute weight.
- Watch your surroundings: Set the cup down on stable surfaces. Avoid placing it near edges where it can be knocked over.
- Don’t expose to extreme heat: Leaving your cup in a hot car can weaken the plastic over time, making it more prone to cracking.
- Clean gently: While many Stanley cups are dishwasher-safe, hand washing with mild soap helps preserve the finish and integrity of the handle.
- Inspect regularly: Every few weeks, check for cracks, wobbles, or loose screws. Catching small issues early can prevent bigger problems.
Repair vs. Replace: Making the Smart Decision
When your Stanley handle breaks, the decision to repair, claim, or replace isn’t always obvious. Here’s a breakdown to help you choose wisely.
| Factor | DIY Repair | Warranty Claim | Purchase New Cup |
| Damage Severity | Minor cracks, loose attachments, clean breaks | Manufacturing defects, material failure | Severe, irreparable damage, sentimental value |
| Cost | Low (materials only) | Free (if approved) | Full retail price |
| Time Investment | Low to moderate (minutes to hours for cure) | Moderate to high (weeks for processing) | Low (immediate purchase) |
| Durability | Varies (depends on repair quality) | High (new product) | High (new product) |
| Environmental Impact | Low (extends product life) | Moderate (new product, old one recycled) | Highest (new product, old one to landfill) |
| Effort Required | Hands-on, requires tools/materials | Administrative (forms, communication) | Minimal (shopping) |
Choose DIY Repair if: The break is minor, you’re comfortable with basic tools, or the damage is clearly from an accident (and thus not warranty-covered).
File a Warranty Claim if: The handle failed unexpectedly during normal use, you suspect a defect, or the break seems premature for the cup’s age.
Buy a New Cup if: The body is damaged, the repair won’t hold, or you’d rather upgrade to a different model or size.
Conclusion: Keep Your Hydration Companion Going Strong
A broken Stanley cup handle doesn’t have to be the end of the story. With the right approach—whether it’s a careful epoxy repair, a successful warranty claim, or a smart replacement—you can extend the life of a tumbler built to last. These cups are designed for adventure, and a little damage is often just part of the journey. By understanding your options and acting promptly, you can keep your Stanley by your side for years to come, ready for every hot coffee, iced tea, or post-hike refill.
Frequently Asked Questions (FAQ)
What should be my immediate first step when I discover my Stanley cup handle is broken?
Your immediate first step should be to assess the damage. Determine if the handle is completely snapped, just loose, or if there’s a visible crack. This diagnosis will guide your next decision: whether a DIY fix is appropriate, if it warrants a warranty claim, or if it’s beyond reasonable repair.
Is it truly possible to reattach a handle that has completely snapped off a Stanley cup, or is it usually beyond repair?
Yes, it is often possible to reattach a completely snapped handle, especially if the break is clean and the pieces fit together well. Strong two-part epoxy is usually the most effective adhesive for this type of repair, providing a durable bond. However, the long-term strength depends on the specific plastic, the cleanliness of the break, and the quality of the repair.
What specific tools and materials are essential for attempting a DIY Stanley handle repair at home?
For most DIY repairs, you’ll need:
- Adhesive: Two-part epoxy or industrial-strength super glue.
- Cleaning Supplies: Rubbing alcohol or degreaser, clean cloths.
- Abrasive Material: Fine-grit sandpaper (for surface preparation).
- Clamping Tools: Small clamps, strong tape, or rubber bands (for holding pieces during curing).
- Screwdrivers: Small Phillips or flathead (for loose handles or removal).
- Optional: A non-marring pry tool for handle removal, plastic filler for stripped screw holes.
How long can I expect the entire Stanley warranty claim process to take from submission to resolution?
The Stanley warranty claim process typically takes 2 to 4 weeks from the time you submit your claim to receiving a resolution or replacement product. This includes the time for review, processing, and shipping. During peak seasons, it may take slightly longer.
Are there any common mistakes or pitfalls I should actively avoid when trying to fix a Stanley handle myself?
Yes, common mistakes include:
- Insufficient surface preparation: Not cleaning or roughing up surfaces before applying adhesive leads to poor bonds.
- Not using enough (or too much) adhesive: Too little won’t hold; too much can create a messy, weak bond.
- Not clamping properly: Pieces must be held firmly and accurately during the entire curing process.
- Not allowing full cure time: Rushing the process before the adhesive fully cures will result in a failed repair.
- Overtightening screws: This can strip plastic screw holes, making the problem worse.
Can I safely continue to use my Stanley cup if its handle is broken, or does it pose a safety risk?
It depends on the severity of the break. If the handle is completely detached or severely compromised, it’s generally not safe to use the cup by holding the handle, as it could drop and cause spills or injury. If the handle is merely cracked but still securely attached, you can likely continue using the cup by holding its body, but you should address the crack promptly to prevent further damage.
What are the best alternatives if Stanley’s official website does not offer a direct replacement part for my handle?
If official replacements aren’t available, consider these alternatives:
- Third-Party Retailers: Check online marketplaces like Amazon, Etsy, or specialty outdoor gear stores for compatible (unofficial) replacement handles.
- Custom Fabrication: Explore local 3D printing services if you can find or design a suitable handle template for your specific model.
- DIY Customization: Consider creating a paracord handle wrap or a fabric strap as a functional and aesthetically pleasing alternative.
Does the specific model or series of my Stanley cup (e.g., Quencher H2.0, Adventure series) influence the recommended repair methods?
Yes, the specific model can influence repair methods, particularly regarding handle attachment mechanisms. Some models use visible screws, while others may have hidden pins or clips. This affects the ease of removal and replacement. However, general adhesive repair principles for plastic breaks remain largely the same across models.
Is seeking professional repair for a broken Stanley cup handle a viable or cost-effective option?
For most Stanley cup handle breaks, seeking professional repair is generally not a cost-effective option. The cost of specialized labor often exceeds the price of a new cup or the materials for a DIY repair. Professional repairs are usually reserved for more complex or high-value items. It’s usually better to pursue a warranty claim or attempt a DIY fix.
How do I accurately determine if my Stanley cup handle’s damage falls under the “Built For Life” warranty coverage?
To determine if your damage falls under warranty, ask yourself:
- Was it a manufacturing defect? Did the handle break spontaneously or under normal use without impact?
- Is it material failure? Did the plastic or attachment points degrade unusually quickly?
The warranty generally covers flaws in materials and workmanship, not “normal wear and tear,” accidental damage (like dropping), or misuse. Review Stanley’s official warranty page for explicit details (Stanley 1913 Warranty Page) and take clear photos to support your claim.
發佈留言
很抱歉,必須登入網站才能發佈留言。