Forex Patterns: Master 7 Essential Chart Formations for Smarter Trading Decisions
Introduction to Forex Chart Patterns
Understanding forex chart patterns is a cornerstone of technical analysis, offering traders a visual roadmap to anticipate future movements in currency prices. These recurring formations are more than just shapes on a screen—they reflect the underlying dynamics between buyers and sellers, capturing shifts in market sentiment before they fully unfold. By learning to identify these patterns, traders can pinpoint high-probability moments to enter or exit positions, align their strategies with market momentum, and manage risk with greater precision. Whether you’re trading major pairs like EUR/USD or navigating the volatility of emerging market currencies, mastering chart patterns enhances your ability to make informed, disciplined decisions in the fast-moving world of foreign exchange.
The Foundation: Understanding Market Trends and Support/Resistance
Before diving into specific patterns, it’s essential to build a solid understanding of market trends and the role of support and resistance. These elements form the backbone of technical analysis and provide context for every pattern you’ll encounter. A market trend describes the overall direction of price movement—whether it’s advancing (an uptrend), declining (a downtrend), or moving sideways in a range. An uptrend is defined by a series of higher highs and higher lows, while a downtrend shows lower highs and lower lows. In contrast, a sideways or consolidating market lacks a clear direction and often sets the stage for future breakouts.
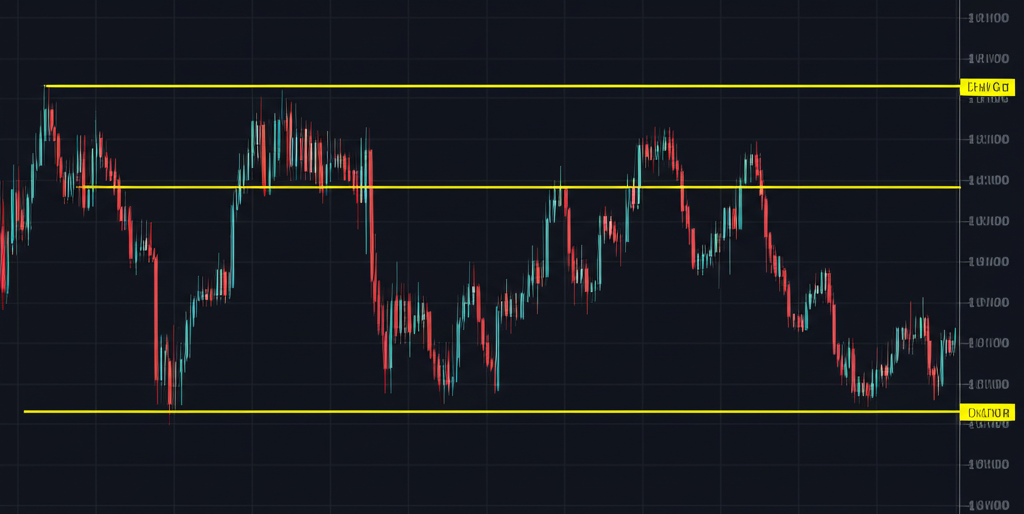
Support and resistance levels act as invisible barriers where price tends to pause or reverse. Support represents a price zone where buying interest is strong enough to prevent further declines, while resistance is where selling pressure typically emerges to halt upward movement. These levels are not fixed numbers but dynamic zones shaped by trader psychology and historical price behavior. As Investopedia highlights, recognizing how these levels interact with price action helps traders anticipate where reversals or breakouts are most likely to occur, laying the groundwork for identifying meaningful chart patterns.
Reversal Chart Patterns: Signaling Trend Changes

Reversal patterns emerge when the prevailing trend begins to lose strength, signaling that control may be shifting from one side of the market to the other. These formations often appear at the end of extended moves and suggest that the momentum driving the trend is fading. Spotting a reversal pattern early allows traders to prepare for a potential change in direction, either by closing existing positions or positioning for a new trade in the opposite direction. While no pattern guarantees a reversal, these structures increase the odds of making timely and well-informed decisions.
Head and Shoulders (H&S) and Inverse H&S
One of the most widely recognized and reliable reversal patterns is the Head and Shoulders (H&S). It typically forms after a sustained uptrend and signals a potential bearish reversal. The structure consists of three peaks: the left shoulder, a higher central peak (the head), and a right shoulder that fails to reach the height of the head. The neckline, drawn by connecting the two reaction lows between the peaks, acts as a key level to watch. When price breaks below the neckline with conviction, it confirms the bearish shift.
The Inverse Head and Shoulders, also known as the reverse H&S, is its bullish counterpart and usually appears at the bottom of a downtrend. In this case, the pattern features two troughs with a deeper low in the middle, followed by a breakout above the neckline. Traders often enter long positions on a confirmed breakout, placing a stop-loss just below the lowest point of the formation. A common profit target is measured by taking the vertical distance from the head to the neckline and projecting it downward (for H&S) or upward (for inverse H&S) from the breakout point. The symmetry and clarity of this pattern make it a favorite among technical traders.
Double Top and Double Bottom
The Double Top is a straightforward yet powerful bearish reversal pattern that forms when price attempts to break above a resistance level twice but fails on the second try. Visually, it resembles an “M” shape, with two peaks at roughly the same level separated by a dip in between. The pattern is confirmed when price closes below the low of the trough—the neckline—signaling that sellers have regained control.
On the flip side, the Double Bottom is a bullish reversal that mirrors the Double Top, forming an “W” shape at the end of a downtrend. It occurs when price tests a support level twice, holds both times, and then surges above the high of the intermediate peak. Confirmation comes with a breakout above this neckline. Both patterns reflect a shift in market sentiment: in the Double Top, bullish optimism fades after repeated rejection; in the Double Bottom, selling pressure dries up as buyers step in consistently. Entry is typically taken on the breakout, with stop-loss orders placed just beyond the second peak or trough, and profit targets based on the pattern’s height.
Triple Top and Triple Bottom
Building on the concept of double tops and bottoms, the Triple Top and Triple Bottom patterns add an extra test of a key level, reinforcing the strength of support or resistance. A Triple Top forms when price reaches the same resistance level three times without breaking through, creating three distinct peaks. Each failed attempt erodes confidence among bulls and increases the likelihood of a downward reversal. Similarly, a Triple Bottom occurs when price bounces off a support level three times, indicating growing buying interest and potential for an upward breakout.
These patterns are less frequent than their double counterparts but often carry more weight due to the repeated rejection of a price extreme. Confirmation comes only after a decisive breakout beyond the neckline—either below for a Triple Top or above for a Triple Bottom. Because of the additional confirmation built into the structure, many traders view these patterns as higher-probability setups. Still, patience is crucial: waiting for a clean break and ideally some volume confirmation helps avoid false signals.
Rising and Falling Wedges
Wedges are versatile formations that can signal either a reversal or a continuation, depending on context. A Rising Wedge appears during an uptrend and consists of two converging upward-sloping trendlines, with the lower line steeper than the upper. Despite the upward tilt, the narrowing range suggests that buying momentum is slowing. When price eventually breaks below the lower trendline, it often triggers a sharp downward move, confirming a bearish reversal.
Conversely, a Falling Wedge typically forms during a downtrend and features two downward-sloping trendlines converging toward each other, with the upper line steeper. This pattern reflects weakening selling pressure and can lead to a bullish breakout when price pushes above the upper boundary. While wedges can sometimes act as continuation patterns in strong trends, they are most commonly associated with trend reversals, especially when they appear after prolonged moves. The key to trading them successfully lies in identifying the direction of the breakout and ensuring it aligns with broader market conditions.
Continuation Chart Patterns: Confirming the Trend
Not all chart patterns suggest a change in direction. Continuation patterns indicate that the market is pausing to gather energy before resuming its prior trend. These formations are particularly valuable for traders already positioned in the direction of the trend, as they offer opportunities to add to winning trades or re-enter after a temporary pullback. Because they occur within established trends, continuation patterns tend to have a higher success rate when properly identified and confirmed.
Triangles (Symmetrical, Ascending, Descending)
Triangles are among the most common continuation patterns and represent periods of consolidation where price action narrows over time. They are formed by two converging trendlines that meet at a point, creating a triangular shape.
* **Symmetrical Triangle:** This neutral pattern forms when price is bound by a descending resistance line and an ascending support line. It reflects a balance between buyers and sellers, with neither side gaining control. The breakout direction—up or down—determines the next move, though it usually favors the direction of the preceding trend.
* **Ascending Triangle:** Characterized by a flat resistance level and rising support, this pattern typically appears in an uptrend and suggests accumulation by buyers. The repeated push into resistance indicates growing demand, and a breakout above resistance often leads to a strong upward move.
* **Descending Triangle:** The opposite of the ascending triangle, this pattern features a flat support level and declining resistance. It signals increasing supply and often precedes a bearish breakdown, especially when it forms during a downtrend.
In all cases, traders wait for a clear breakout beyond the triangle’s boundary before entering. The projected price target is usually derived from the widest part of the triangle, measured from the breakout point.
Flags and Pennants
Flags and pennants are short-term consolidation patterns that occur after a sharp, nearly vertical price movement—often referred to as the “flagpole.” These patterns reflect brief pauses in strong trends, as traders take profits or new participants wait for entry.
* **Flag:** A flag looks like a small rectangle that slopes against the direction of the main trend. For example, in a strong uptrend, the flag will slope downward; in a downtrend, it slopes upward. This counter-trend movement is usually shallow and short-lived.
* **Pennant:** Similar to a flag but shaped like a small symmetrical triangle, the pennant forms after a rapid price move and shows a brief period of indecision.
Both patterns are resolved with a breakout in the direction of the original trend. Profit targets are commonly set by measuring the length of the flagpole and projecting it from the breakout point. As BabyPips explains, these patterns are excellent for capturing the next leg of a strong move, especially in high-momentum environments.
Rectangles (Trading Ranges)
Rectangles, also known as trading ranges or consolidation zones, form when price moves sideways between parallel support and resistance levels. This pattern reflects a period of equilibrium, where neither bulls nor bears can gain the upper hand. While rectangles can occasionally lead to reversals, they more often serve as continuation patterns, especially when they appear within a well-established trend.
Traders have two main approaches: they can trade the range by buying near support and selling near resistance, or they can wait for a breakout to join the resuming trend. The latter is generally preferred for higher-risk, higher-reward setups. A valid breakout should come with increased momentum and, ideally, a surge in volume. Stop-losses are typically placed just inside the opposite boundary of the range, and profit targets are based on the height of the rectangle projected from the breakout point.
| Pattern Type | Category | Signal | Common Entry Strategy |
|---|---|---|---|
| Head and Shoulders | Reversal | Bearish (end of uptrend) | Break below neckline |
| Inverse H&S | Reversal | Bullish (end of downtrend) | Break above neckline |
| Double Top | Reversal | Bearish (end of uptrend) | Break below neckline |
| Double Bottom | Reversal | Bullish (end of downtrend) | Break above neckline |
| Triangles (Symmetrical, Ascending, Descending) | Continuation (mostly) | Trend resumption | Breakout of trend lines |
| Flags & Pennants | Continuation | Short-term trend pause, then resumption | Breakout in direction of prior trend |
Integrating Candlestick Patterns for Stronger Confirmation
While chart patterns give a broad view of market structure, candlestick patterns offer granular insights into short-term price behavior and sentiment. Combining the two creates a more complete analytical picture and increases the reliability of trade signals. For example, a Head and Shoulders pattern nearing completion becomes much more convincing if a bearish engulfing candle or an evening star forms right at the neckline during the breakdown. These candlestick signals indicate strong selling pressure at a critical level, adding weight to the reversal thesis.
Similarly, in a Double Bottom, a bullish hammer or morning star candle at the second low can serve as a powerful confirmation that buyers are stepping in aggressively. When such a candle is followed by a decisive breakout above the neckline, the probability of a successful long trade increases significantly. This layered approach—using candlesticks to fine-tune entries within larger chart patterns—helps traders avoid false breakouts and improves timing. As Fidelity’s guide to chart patterns also emphasizes, confirmation from multiple sources strengthens decision-making and reduces emotional trading.
The Psychology Behind Chart Patterns
Behind every chart pattern is a story of human emotion—fear, greed, hope, and hesitation. These formations are not random; they are the visual footprint of collective market behavior. Take the Head and Shoulders pattern: the first shoulder represents strong buying enthusiasm, the head shows even greater optimism pushing price to new highs, but the failure to exceed that peak on the second shoulder reveals weakening demand. As sellers begin to outnumber buyers, fear takes hold, leading to a breakdown.
Consolidation patterns like triangles and rectangles reflect periods of uncertainty. Traders are unsure whether to buy or sell, leading to tighter price ranges. When the breakout finally occurs, it’s often explosive, as pent-up energy is released in one direction. Understanding this psychological ebb and flow allows traders to anticipate reactions rather than simply reacting to price. It transforms technical analysis from a mechanical exercise into a strategic tool grounded in behavioral finance.
Practical Trading Strategies with Forex Chart Patterns
Recognizing a chart pattern is only the first step. Turning that insight into profitable trades requires a disciplined, rules-based approach that includes precise entries, exits, and risk controls.
Identifying High-Probability Setups
To increase the odds of success, focus on clean, well-defined patterns that form in the context of a strong trend. Avoid fitting patterns to messy or choppy price action. Look for confluence—additional factors that support your trade idea, such as alignment with key support/resistance levels, moving averages, or Fibonacci retracements. The more confirming elements present, the stronger the setup. Patterns that develop over longer timeframes (like daily or weekly charts) also tend to carry more weight than those on lower timeframes.
Entry Points, Stop-Loss, and Take-Profit Targets
* **Entry Points:** For breakout patterns like triangles, flags, or Head and Shoulders, wait for a confirmed break—ideally with a strong candle closing beyond the boundary. Avoid entering on wicks or intrabar breaks that may reverse.
* **Stop-Loss:** Risk management is non-negotiable. For reversal patterns, place the stop just beyond the pattern’s extreme—above the head in a Head and Shoulders, below the lowest low in a Double Bottom. For continuation patterns, a stop can be placed inside the consolidation zone to protect against false breakouts.
* **Take-Profit Targets:** Use the measured move technique. In a Head and Shoulders, measure the vertical distance from the head to the neckline and project it downward from the breakout point. For triangles, use the height of the widest section. Adjust targets based on nearby structural levels like support/resistance or Fibonacci extensions.
Volume Analysis and Confirmation
Though direct volume data in forex is limited compared to equities, volume proxies—such as tick volume or time-based volume in platforms like TradingView—can still offer valuable insights. A breakout accompanied by a noticeable increase in volume suggests strong participation and conviction, increasing the likelihood that the move will continue. Conversely, a breakout on low volume may lack follow-through and could reverse. Declining volume during consolidation often signals building pressure, making a subsequent breakout more likely.
Risk Management and Position Sizing
Even the most reliable pattern can fail. That’s why protecting capital is more important than chasing profits. A widely accepted rule is to risk no more than 1–2% of your trading account on any single trade. Position size should be calculated based on the distance to your stop-loss and your risk tolerance. For example, if your stop is 50 pips away and you’re willing to risk $100, your position size should reflect that. Consistent risk management ensures longevity in the market, allowing you to survive inevitable losses and stay active during winning streaks.
Common Mistakes and How to Avoid Them
Many traders struggle with chart patterns not because the concepts are difficult, but because of behavioral and execution errors. One of the most common mistakes is forcing a pattern onto price action that doesn’t clearly support it—seeing shapes where none exist. This leads to subjective, low-probability trades. Always wait for full confirmation before acting.
Another pitfall is trading breakouts prematurely—entering before price closes convincingly beyond the pattern boundary. Patience is key. Ignoring the broader market context is also dangerous; a reversal pattern in a strong bull market may simply be a pause, not a reversal. Overtrading, poor position sizing, and abandoning stop-losses are equally damaging. The best defense is a written trading plan that outlines entry, exit, and risk rules—and the discipline to follow it without deviation.
Advanced Tips: Backtesting and Automated Pattern Recognition Tools
To truly master chart patterns, traders should test their strategies against historical data through backtesting. This process involves reviewing past charts to see how often a pattern led to a successful outcome and how well your entry and exit rules perform. Backtesting helps refine your methodology, build confidence, and eliminate biases.
In recent years, automated pattern recognition tools have become increasingly accessible. Platforms like TradingView, MetaTrader 4/5, and cTrader offer built-in or custom indicators that scan charts for potential patterns in real time. These tools can save hours of manual analysis and help spot formations you might otherwise miss. However, they’re not foolproof. Algorithms may identify patterns that are too small, too distorted, or lack proper context. Use them as a starting point, but always apply your own judgment before taking a trade.
Conclusion: Mastering Chart Patterns for Consistent Forex Trading
Chart patterns are a powerful tool in the technical trader’s arsenal, offering a structured way to interpret market behavior and anticipate future moves. From foundational concepts like trends and support/resistance to complex formations like Head and Shoulders and rising wedges, these patterns provide actionable insights when used correctly. By combining them with candlestick analysis, understanding the psychology behind price action, and applying disciplined risk management, traders can significantly improve their edge in the forex market.
Success doesn’t come from spotting every pattern, but from mastering a few high-probability setups and executing them with consistency. Continuous learning, rigorous backtesting, and emotional control separate occasional winners from long-term profitability. With time and practice, chart pattern trading can evolve from a theoretical skill into a reliable, repeatable strategy for navigating the dynamic world of currency markets.
What is the most successful pattern in forex for consistent profits?
There isn’t a single “most successful” pattern that guarantees consistent profits, as market conditions constantly change. However, patterns like the Head and Shoulders, Double Top/Bottom, and Triangles are widely considered reliable due to their clear structure and psychological basis. Their success largely depends on proper identification, confirmation, and stringent risk management.
How can I get a free forex patterns PDF or cheat sheet for quick reference?
Many reputable forex education websites, brokers, and trading communities offer free downloadable PDFs or cheat sheets summarizing common forex chart patterns. A quick search on platforms like BabyPips, Investopedia, or even specific broker’s educational sections often yields such resources. These can be excellent for quick reference during live trading.
What is the 90% rule in forex trading, and how does it relate to chart patterns?
The “90% rule” in forex trading is a concept, often attributed to trader Edwin Lefèvre, which suggests that 90% of traders fail to make money over 90% of the time, often losing 90% of their capital within 90 days. While not directly related to chart patterns themselves, it serves as a stark reminder of the importance of discipline, risk management, and solid trading strategies—including the correct application of chart patterns—to avoid becoming part of that statistic.
Are there specific forex patterns that work best on certain currency pairs?
While chart patterns are universal, their frequency and clarity can vary across currency pairs. Highly liquid major pairs like EUR/USD, GBP/USD, and USD/JPY often exhibit cleaner patterns due to the sheer volume of participants. Exotic or less liquid pairs might have choppier price action, making pattern identification more challenging. It’s best to observe how patterns behave on your preferred pairs through backtesting.
What is the 5 3 1 rule in forex, and is it applicable to chart pattern trading?
The “5-3-1 rule” is not a universally recognized or standardized forex trading rule. Different traders or educators might use similar numerical rules for various aspects of trading (e.g., risk management percentages, trade frequency). If it refers to a specific strategy, its applicability to chart pattern trading would depend entirely on the specifics of that rule. Generally, sound chart pattern trading relies on established technical analysis principles, not specific numbered rules that are not widely accepted.
How do chart patterns differ from candlestick patterns, and can they be used together?
Chart patterns (e.g., Head and Shoulders, Triangles) are larger formations that develop over multiple trading periods, indicating broader market sentiment and potential trend changes or continuations. Candlestick patterns (e.g., Doji, Hammer, Engulfing) are smaller, often single or two-to-three candle formations that give immediate insights into price action and sentiment within a specific period. Yes, they can and should be used together for enhanced confirmation, with candlestick patterns often providing entry signals at key points of larger chart patterns.
What are the 7 main forex pairs, and how do patterns behave on them?
The 7 major forex pairs are EUR/USD, USD/JPY, GBP/USD, AUD/USD, USD/CAD, USD/CHF, and NZD/USD. These pairs are highly liquid, meaning they are actively traded and tend to exhibit clearer, more reliable chart patterns due to the large number of market participants. Patterns on these pairs are often more textbook-like compared to less liquid cross-currency or exotic pairs, making them ideal for pattern-based trading strategies.
Where can I find real-time forex pattern recognition tools or software?
Many popular trading platforms, such as MetaTrader 4/5, TradingView, and cTrader, offer built-in indicators or allow for custom indicators that can identify chart patterns in real-time. Additionally, some brokers provide proprietary tools or integrate third-party pattern recognition software. A quick search for “forex chart pattern scanner” or “pattern recognition indicator MT4” will reveal various options, though always ensure their reliability.
How important is risk management when trading forex chart patterns?
Risk management is paramount and arguably the most critical aspect of trading forex chart patterns. No pattern is 100% accurate, and false breakouts or failed patterns are common. Proper risk management, including setting stop-loss orders, defining position sizes, and never risking more than 1-2% of your capital per trade, protects your trading account from significant losses and ensures long-term sustainability, even if some pattern trades fail.
What are the common pitfalls to avoid when identifying and trading forex chart patterns?
- Forcing patterns: Trying to see patterns where they don’t clearly exist.
- Trading without confirmation: Entering trades before a pattern is fully formed or confirmed by a breakout/volume.
- Ignoring the overall trend: Focusing solely on a pattern without considering the broader market context.
- Poor risk management: Not using stop-losses or risking too much capital per trade.
- Lack of patience: Rushing into trades or not waiting for optimal setups.
- Over-reliance on automation: Using pattern recognition tools without understanding the underlying principles.
發佈留言
很抱歉,必須登入網站才能發佈留言。