
October 4 Blackout Reddit: What You Need to Know About Trading Trends
“`html
Understanding Technical Analysis: A Trader’s Essential Toolkit
Welcome to the fascinating world of financial markets! As you embark on your journey as a trader or seek to deepen your understanding, you’ll quickly encounter two primary approaches to analyzing potential market movements: fundamental analysis and technical analysis.
While fundamental analysis focuses on intrinsic value, examining economic indicators, company reports, industry trends, and geopolitical events, technical analysis takes a distinctly different path. It operates on the premise that all known information is already reflected in an asset’s price. What we see on the price chart is the sum total of market psychology, supply, and demand at any given moment. Our goal, as technical analysts, is not to predict the future with certainty, but rather to identify patterns, trends, and probabilities based on historical price and volume data.
Think of it like this: A fundamental analyst might study the detailed blueprints and structural integrity of a building to determine its worth. A technical analyst, on the other hand, observes the building’s current condition, how many people are entering and leaving, whether its windows are intact, and perhaps even how similar buildings have fared historically in various conditions. Both methods can be valuable, but they look at the same subject from different angles.
In this guide, we will dive deep into the core principles and practical tools of technical analysis, equipping you with a foundational understanding to interpret market charts and potentially improve your trading decisions. Are you ready to start reading the language of price?
The price chart is the technical analyst’s primary canvas. While the underlying data is the same (price over time), how this data is visualized can significantly impact your interpretation and the types of information you can glean. Let’s explore the most common chart types you will encounter.
Line Charts: This is the simplest form of charting. A line chart connects a series of data points, typically the closing price, over a specific period. It provides a clear, uncluttered view of the general trend but offers limited detail about the price movement within each period (e.g., a day, hour, or minute).
Line charts are excellent for getting a quick overview of long-term trends and are often used in fundamental analysis to visualize trends in economic data or corporate performance. However, for detailed technical analysis, they lack the richness of other chart types.
Bar Charts: Bar charts provide more information than line charts. Each vertical bar represents a specific time period. For each bar, you will see:
- The top of the vertical bar indicates the highest price reached during that period (High).
- The bottom of the vertical bar indicates the lowest price reached during that period (Low).
- A small horizontal tick on the left side of the bar shows the opening price for the period (Open).
- A small horizontal tick on the right side of the bar shows the closing price for the period (Close).
This Open-High-Low-Close (OHLC) data provides a much better picture of the price action within a given timeframe. You can see the range of price movement, where the price opened, and crucially, where it closed relative to the open and the high/low.
Candlestick Charts: Developed in Japan by rice traders centuries ago, candlestick charts are now arguably the most popular chart type in technical analysis. Like bar charts, each candlestick represents a specific time period and provides OHLC data, but they do so in a visually intuitive way that highlights the relationship between the open and close prices.
A candlestick has a ‘body’ and ‘wicks’ or ‘shadows’:
- The Body represents the range between the opening and closing prices.
- If the close price is higher than the open price, the body is typically colored green or white (indicating a bullish period).
- If the close price is lower than the open price, the body is typically colored red or black (indicating a bearish period).
- The Wicks (Shadows) extend above and below the body. The upper wick represents the highest price reached during the period, and the lower wick represents the lowest price reached during the period.
The size and color of the body, as well as the length of the wicks, provide quick visual cues about the market sentiment during that period. For example, a long green body suggests strong buying pressure, while a long red body indicates significant selling pressure. Long wicks can indicate price rejection at certain levels.
Candlestick charts are favored because they make it easy to spot patterns forming over one or several periods, which are believed to have predictive value regarding potential future price movement. Understanding these patterns is a fundamental skill for any technical trader.
When choosing a chart type, most technical traders gravitate towards candlestick charts due to their visual clarity and the wealth of information they convey about market sentiment within each period. The platform you use will offer options for displaying these charts.
If you’re exploring platforms for technical analysis, especially for instruments like Forex or CFDs, having access to robust charting tools is essential. In this context, platforms like Moneta Markets are often considered. It’s an Australian-based platform offering a wide range of financial instruments and supporting popular charting software like MT4, MT5, and Pro Trader, which are staples for applying the technical concepts we’re discussing.
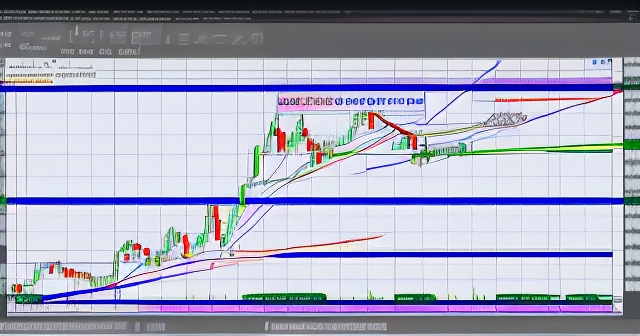
Identifying Strength and Weakness: Support and Resistance
Support and resistance levels are perhaps the most fundamental concepts in technical analysis. They represent price levels on a chart where the price has previously struggled to move beyond, acting like invisible barriers.
Support: A support level is a price level where a downtrend is expected to pause or reverse due to a concentration of buying interest. When the price falls towards a support level, buyers tend to step in, pushing the price back up. Think of it as a floor; the price hits it and bounces.
Resistance: A resistance level is a price level where an uptrend is expected to pause or reverse due to a concentration of selling interest. When the price rises towards a resistance level, sellers tend to step in, pushing the price back down. Think of it as a ceiling; the price hits it and falls back.
How do these levels form? They are often a result of market psychology and past price action. Previous swing highs often become future resistance, and previous swing lows often become future support. Round numbers (e.g., $100, $50) can also act as psychological support or resistance.
Identifying valid support and resistance levels requires practice. Look for levels where the price has touched or reversed from multiple times. The more times a level has been tested and held, the stronger it is considered to be.
What happens when price breaks through a support or resistance level? This is often a significant event. A break above resistance suggests that the buying pressure has overcome the selling pressure at that level, and the former resistance can now act as new support. Conversely, a break below support suggests selling pressure has overwhelmed buying, and the former support can become new resistance. This concept of “polarity change” is crucial.
Support and resistance don’t have to be exact lines; they are often better viewed as zones or areas on the chart, representing a range where buying or selling interest is concentrated.
Mastering the identification and interpretation of support and resistance is foundational because these levels are used to:
- Identify potential entry points (e.g., buying near support, selling near resistance).
- Identify potential exit points or price targets (e.g., taking profit near the next resistance in an uptrend).
- Place stop-loss orders (e.g., placing a stop-loss just below a support level in a long trade).
- Identify potential trend reversals (e.g., a strong break below a key support level).
Without understanding support and resistance, it’s difficult to effectively use most other technical analysis tools. They provide the context for price movement.
Charting the Course: Trendlines and Channels
Building upon the idea that prices move in trends, trendlines are visual tools we use to identify and confirm the direction and strength of a trend. They are essentially diagonal lines drawn directly on the price chart.
Uptrend Line: In an uptrend, we draw a trendline connecting two or more consecutive higher lows. This line acts as dynamic support. As the price pulls back towards the trendline, it’s expected to find buying support and bounce higher. A valid uptrend line requires at least two touches (or more ideally, three or more) to be considered significant. The steeper the slope, the stronger the perceived momentum of the uptrend.
Downtrend Line: In a downtrend, we draw a trendline connecting two or more consecutive lower highs. This line acts as dynamic resistance. As the price rallies towards the trendline, it’s expected to encounter selling pressure and reverse lower. A valid downtrend line requires at least two touches (or more) to be considered significant. A steeper slope suggests stronger bearish momentum.
Trendlines help us visualize the trend, but they also serve as potential trading signals. A break below a significant uptrend line can signal a potential trend change or reversal, while a break above a downtrend line can signal a potential reversal to the upside.
Channels: Channels are formed by drawing two parallel trendlines, one acting as support and the other as resistance.
- An Uptrend Channel consists of an uptrend line connecting higher lows (support) and a parallel line connecting higher highs (resistance). Price tends to trade between these two lines.
- A Downtrend Channel consists of a downtrend line connecting lower highs (resistance) and a parallel line connecting lower lows (support). Price tends to trade within these lines.
- A Horizontal Channel (also known as a rectangle or range) consists of horizontal support and resistance lines, indicating a sideways market where price is consolidating.
Trading within channels involves buying near the support line and selling near the resistance line (or selling short near resistance and covering near support). A breakout from a channel, either above the upper line in an uptrend channel or below the lower line in a downtrend channel (or out of a horizontal channel), can signal a significant acceleration or change in the trend direction. The expected price movement after a channel breakout is often estimated by measuring the width of the channel and projecting that distance from the breakout point.
Drawing trendlines and channels accurately takes practice. There is a degree of subjectivity involved, and different traders might draw slightly different lines. However, the principle remains the same: they help define the boundaries of price movement within a trend and offer potential trading opportunities when those boundaries are tested or broken.
Remember, trendlines and channels are tools to help you visualize and analyze price movement; they are not guarantees of future price action. Always combine them with other technical tools and risk management strategies.
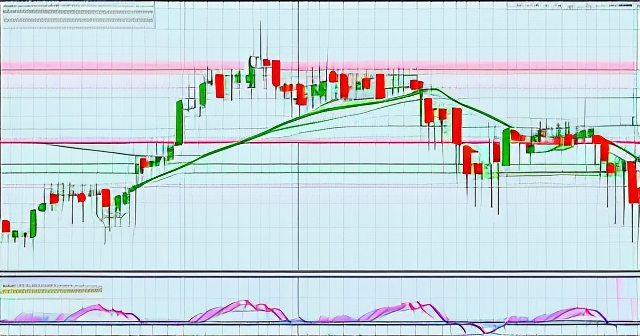
Smoothing the Noise: Moving Averages
Moving averages (MAs) are among the most popular and versatile technical indicators. They are called “moving” because they calculate the average price of an asset over a specific number of periods, and this average is recalculated with each new period, causing the line on the chart to move as the price changes.
The primary purpose of a moving average is to smooth out price data over time, creating a single, flowing line that makes it easier to identify trends and reduce the impact of random price fluctuations (“noise”).
There are different types of moving averages, but the two most common are:
1. Simple Moving Average (SMA): An SMA is calculated by taking the arithmetic mean of a set of prices over a specified number of periods and dividing by the number of periods. For example, a 20-period SMA on a daily chart would average the closing prices of the last 20 days. The next day, the oldest price drops off, and the newest day’s price is added to the calculation.
The SMA is simple to understand and calculate, but it gives equal weight to each price in the calculation period. This means that the oldest price in the period has the same influence as the most recent price.
2. Exponential Moving Average (EMA): An EMA is a type of moving average that places a greater weight and significance on the most recent data points. It is more responsive to recent price changes than an SMA of the same period length.
EMAs are often favored by traders who want a moving average that reacts more quickly to current market conditions, potentially providing earlier signals. However, this responsiveness also means EMAs can be more prone to false signals during choppy or sideways markets.
How to Use Moving Averages:
- Identifying Trends: The direction of the moving average indicates the trend direction. An upward-sloping MA suggests an uptrend, while a downward-sloping MA suggests a downtrend. The longer the period of the MA, the slower it will react and the better it is for identifying longer-term trends. Shorter-period MAs are used for identifying shorter-term trends or for signal generation.
- Support and Resistance: Moving averages can act as dynamic support and resistance levels. In an uptrend, the price often finds support at or near a moving average (e.g., the 50-day or 200-day MA). In a downtrend, the price often finds resistance at or near a moving average.
- Crossovers: One of the most common ways to generate trading signals with moving averages is by using crossovers of two MAs of different lengths. A bullish crossover (often called a “Golden Cross”) occurs when a shorter-period MA crosses above a longer-period MA (e.g., the 50-day SMA crossing above the 200-day SMA). This is seen as a strong bullish signal. A bearish crossover (often called a “Death Cross”) occurs when a shorter-period MA crosses below a longer-period MA, seen as a strong bearish signal. Crossovers of shorter-period MAs are used for more frequent signals.
- MA as a Lagging Indicator: It’s important to remember that moving averages are lagging indicators. They are based on past price data and will always trail the current price. They confirm trends that are already in progress rather than predicting future price movements. This lag can be a drawback, as signals may occur after a significant portion of a move has already happened.
Choosing the appropriate period length for your moving averages depends on your trading style and the timeframe you are analyzing. Common periods include 10, 20, 50, 100, and 200 periods.
Experimenting with different MA types and periods on historical data for the specific assets you trade (whether that’s stocks, commodities, or currency pairs) is key to finding what works best for your strategy.
For traders focusing on Forex or CFDs, using platforms that integrate well with sophisticated charting software like MT4 or MT5 is beneficial. These platforms offer a wide array of technical indicators, including various types of moving averages, allowing you to apply and test these concepts rigorously.
Measuring Momentum: Oscillators
While moving averages help identify trends and dynamic support/resistance, oscillators are a class of technical indicators that measure the momentum or speed of price changes. They typically fluctuate within a bounded range (e.g., 0 to 100) and are often displayed in a separate panel below the main price chart.
Oscillators are particularly useful in helping us identify potential overbought or oversold conditions, as well as divergences between the indicator and the price action, which can signal potential trend reversals or continuations.
Let’s look at two of the most popular oscillators:
1. Relative Strength Index (RSI): Developed by J. Welles Wilder Jr., the RSI is a momentum oscillator that measures the speed and change of price movements. It fluctuates between 0 and 100. The standard setting for the RSI period is 14 (periods).
Key interpretations of the RSI:
- Overbought/Oversold Levels: Traditionally, an RSI reading above 70 is considered overbought, suggesting the price has risen too quickly and might be due for a pullback or reversal. An RSI reading below 30 is considered oversold, suggesting the price has fallen too quickly and might be due for a bounce or reversal. These levels can be adjusted depending on the asset and volatility.
- Centerline Crossover: The 50 level is the centerline. A move above 50 suggests increasing bullish momentum, while a move below 50 suggests increasing bearish momentum.
- Divergence: This is a powerful signal. Divergence occurs when the price makes a new high/low, but the RSI does not.
- Bearish Divergence: Price makes a higher high, but RSI makes a lower high. This suggests that despite the price rising, the underlying momentum is weakening, potentially foreshadowing a downward reversal.
- Bullish Divergence: Price makes a lower low, but RSI makes a higher low. This suggests that despite the price falling, the underlying momentum is strengthening, potentially foreshadowing an upward reversal.
Divergence signals from RSI are considered more reliable when they occur in overbought or oversold territory.
2. Moving Average Convergence Divergence (MACD): Created by Gerald Appel, the MACD is a momentum indicator that shows the relationship between two moving averages of an asset’s price. It consists of three components:
- The MACD Line: This is typically the difference between a 12-period EMA and a 26-period EMA.
- The Signal Line: This is typically a 9-period EMA of the MACD Line.
- The Histogram: This plots the difference between the MACD Line and the Signal Line.
Key interpretations of the MACD:
- Signal Line Crossovers: The most common signal is when the MACD Line crosses the Signal Line. A bullish signal occurs when the MACD Line crosses above the Signal Line. A bearish signal occurs when the MACD Line crosses below the Signal Line. These crossovers are often used for entry and exit signals.
- Centerline Crossovers: The MACD Line crossing above the zero line indicates increasing bullish momentum, while crossing below the zero line indicates increasing bearish momentum.
- Divergence: Like RSI, MACD can show bullish or bearish divergence with price, signaling potential trend reversals.
The histogram provides a visual representation of the distance between the MACD and Signal lines. Increasing bars away from the zero line indicate strengthening momentum, while decreasing bars towards the zero line suggest momentum is slowing or a crossover might be imminent.
Oscillators are best used in conjunction with trend-following indicators or price action analysis. While they can provide early signals, especially through divergence, relying solely on overbought/oversold levels can be misleading, as prices can remain in these extremes for extended periods during strong trends. Combining oscillators with support/resistance, trendlines, or moving averages can help filter signals and improve their reliability.
Recognizing Market Behavior: Chart Patterns
As we discussed earlier, the principle that history tends to repeat itself is key to understanding chart patterns. These are specific formations that appear on price charts, believed to represent predictable shifts in supply and demand dynamics. Recognizing these patterns can provide insights into potential future price direction and help set price targets and stop-loss levels.
Chart patterns are broadly categorized into two types: Continuation Patterns and Reversal Patterns.
Continuation Patterns: These patterns suggest that after a period of consolidation, the price is likely to continue moving in the same direction as the preceding trend. They represent pauses in the trend as buyers or sellers take a breather before resuming the prior move.
Common Continuation Patterns include:
- Flags and Pennants: These are short-term patterns that form after a sharp, strong price move (the “flagpole”). The price then consolidates in a small rectangular shape (Flag) or a symmetrical triangle shape (Pennant) against the direction of the initial move. The pattern is completed when price breaks out of the consolidation in the direction of the original trend. The expected price target after a breakout is often measured by the length of the flagpole projected from the breakout point.
- Triangles: These involve price consolidating within converging trendlines.
- Symmetrical Triangle: Characterized by converging trendlines where the upper line slopes down and the lower line slopes up at roughly equal angles. Suggests indecision before a potential breakout in either direction (often continues the preceding trend).
- Ascending Triangle: Characterized by a flat upper resistance line and an upward-sloping lower support line. Suggests buying pressure is building, and a breakout above resistance is likely.
- Descending Triangle: Characterized by a flat lower support line and a downward-sloping upper resistance line. Suggests selling pressure is building, and a breakdown below support is likely.
Continuation patterns provide opportunities to join an established trend after a brief consolidation phase. Trading them involves identifying the pattern, waiting for a convincing breakout, and setting targets based on the pattern’s characteristics.
Recognizing Market Turning Points: Reversal Patterns
In contrast to continuation patterns, reversal patterns suggest that the prevailing trend is likely coming to an end and a new trend in the opposite direction is about to begin. Identifying these patterns early can offer opportunities to position yourself for the start of a significant move.
Common Reversal Patterns include:
- Head and Shoulders (H&S): A classic bearish reversal pattern that forms at the top of an uptrend. It consists of three peaks: a central, highest peak (the “Head”), and two lower peaks on either side (the “Shoulders”). A “Neckline” is drawn by connecting the lowest points reached between the peaks. The pattern is confirmed when the price breaks below the neckline. The target price is often estimated by measuring the vertical distance from the top of the Head to the Neckline and projecting that distance downwards from the breakout point.
- Inverse Head and Shoulders: The bullish equivalent of the Head and Shoulders, forming at the bottom of a downtrend. It consists of three troughs (two higher “shoulders” and a lower “head”). The Neckline connects the highest points between the troughs. Confirmation occurs when price breaks above the neckline, with a target price projected upwards from the breakout point.
- Double Top and Double Bottom:
- Double Top: A bearish reversal pattern forming at the top of an uptrend, characterized by two distinct peaks at roughly the same price level, with a trough between them. A neckline is drawn through the lowest point of the trough. Confirmation occurs when price breaks below the neckline.
- Double Bottom: A bullish reversal pattern forming at the bottom of a downtrend, characterized by two distinct troughs at roughly the same price level, with a peak between them. A neckline is drawn through the highest point of the peak. Confirmation occurs when price breaks above the neckline.
The target price for Double Tops/Bottoms is typically the distance from the peaks/troughs to the neckline, projected from the breakout point.
- Triple Top and Triple Bottom: Similar to Double Tops/Bottoms but with three peaks or troughs. These are less common but considered stronger signals due to the repeated failure of price to break through the resistance/support level.
Reversal patterns require careful observation and patience. It’s crucial to wait for confirmation (the break of the neckline or key support/resistance level) before acting on these patterns, as premature entry can lead to false signals.
Combining chart pattern analysis with volume analysis (discussed next) can significantly increase the reliability of the signals. For example, a breakout from a reversal pattern on high volume is considered a stronger signal than a breakout on low volume.
Adding Depth to Analysis: Volume
Volume is a critical piece of information that accompanies price data, yet it is often overlooked by beginner traders. Volume represents the total number of units of an asset traded during a specific time period (e.g., the number of shares, contracts, or currency units traded in a day). It is usually displayed as a bar chart below the price chart.
Volume provides insight into the strength or conviction behind a price move. Think of volume as the “fuel” for price movement. High volume suggests strong interest and participation from traders and investors, while low volume indicates weak interest.
Here’s how we typically interpret volume in technical analysis:
- Volume Confirms Trends: In a healthy uptrend, we ideally want to see volume increasing on upward price movements (buying conviction) and decreasing on downward price pullbacks (weak selling interest). In a healthy downtrend, we want to see volume increasing on downward price movements (selling conviction) and decreasing on upward price rallies (weak buying interest).
- Volume Confirms Breakouts: When price breaks through a significant support or resistance level, a high volume accompanying the breakout indicates strong conviction and increases the likelihood that the breakout is genuine and not a “fakeout” or trap. Low volume on a breakout is a warning sign that the move may lack conviction and could fail.
- Volume on Reversals: Often, significant trend reversals occur on high volume as the balance of power dramatically shifts from buyers to sellers (at a top) or from sellers to buyers (at a bottom). Capitulation moves at market bottoms are often characterized by very high volume as frustrated sellers exit their positions.
- Volume Divergence: Similar to price divergence with oscillators, volume can also diverge with price. For example, if an asset is making new highs but on declining volume, it could indicate that the buying pressure is weakening, potentially foreshadowing a reversal despite the rising price. Conversely, if an asset is making new lows but on declining volume, it might suggest selling pressure is exhausting.
- Low Volume Consolidation: Sideways price movements or consolidations often occur on lower volume as traders pause and await the next catalyst or signal. A breakout from such consolidation on increasing volume is then seen as significant.
Volume is a valuable secondary indicator that should be used to confirm signals generated by price action, patterns, or other indicators. A signal from price or an indicator is generally considered more reliable when it is supported by confirming volume behavior.
Remember that volume interpretation can sometimes be subjective and depends on the specific asset and market conditions. Comparing current volume to recent historical volume is often more insightful than looking at an absolute number.
Trading platforms typically provide volume data integrated below the price chart, allowing you to easily analyze the relationship between price and trading activity as you apply your technical analysis tools.
Synthesizing the Signals: Developing a Trading Plan
Learning individual technical analysis tools – charts, support/resistance, trendlines, MAs, oscillators, patterns, volume – is the first step. The real art lies in combining these tools to form a coherent trading strategy and, most importantly, executing that strategy within a well-defined trading plan.
A trading plan is your roadmap. It’s a set of rules and guidelines that dictate how you approach the market, make decisions, and manage risk. Having a plan helps remove emotion from trading, promotes discipline, and allows you to objectively evaluate your performance.
Here are key components of a trading plan, particularly from a technical analysis perspective:
- Market and Timeframe Selection: What assets will you trade (e.g., Forex pairs, stocks, commodities, cryptocurrencies)? What timeframes will you focus on (e.g., daily charts for swing trading, 15-minute charts for day trading)? Your chosen timeframe will influence which indicators and patterns are most relevant.
- Technical Analysis Tools & Strategy: Which specific technical tools will you use, and how will you combine them? For example, will you look for a bullish MACD crossover that occurs near a key support level, confirmed by increasing volume? Or will you trade breakouts from continuation patterns that align with the direction of the 200-period moving average? Define your setup criteria clearly.
- Entry Criteria: What specific conditions must be met for you to enter a trade? This should be based on the signals from your chosen technical tools. For example, “Enter long only when price breaks above resistance, confirmed by volume above the 20-period average volume, and the RSI is not above 70.”
- Exit Criteria: This is twofold:
- Stop-Loss: Where will you exit the trade if it moves against you to limit your losses? This should be determined *before* you enter the trade, often placed at a logical technical level (e.g., just below a support level, below the neckline of a pattern).
- Take-Profit: Where will you exit the trade if it moves in your favor to lock in profits? This can be based on technical targets (e.g., the next resistance level, the measured move from a chart pattern) or a predetermined risk-reward ratio.
- Risk Management Rules: How much capital will you risk on any single trade? This is often expressed as a percentage of your total trading capital (e.g., never risk more than 1-2% per trade). This rule directly influences your position sizing.
- Trading Journal: Keep a detailed record of every trade – entry/exit prices, date/time, reason for the trade (based on your plan’s criteria), outcome, and lessons learned. Reviewing your journal is crucial for identifying what works and what doesn’t and refining your approach.
Developing a trading plan takes time and effort. It involves backtesting your strategy on historical data and potentially paper trading (trading with virtual money) in live markets before committing real capital. Consistency in following your plan, even when it’s difficult, is paramount for long-term success.
Remember, technical analysis provides probabilities, not certainties. Not every signal will work out. Your trading plan, especially the risk management component, is what protects your capital when trades don’t go as expected.
Protecting Your Capital: Risk Management with Technical Analysis
No matter how skilled you become at technical analysis, losing trades are an inevitable part of trading. What separates consistently profitable traders from those who struggle is often effective risk management. Technical analysis plays a crucial role in this area, particularly in helping you determine where to place stop-loss orders and size your positions appropriately.
1. Position Sizing: This is arguably the most critical aspect of risk management. Position sizing determines the number of units (shares, contracts, lots) you trade based on your risk tolerance and the distance to your stop-loss. A common rule is to risk only a small percentage (e.g., 1% or 2%) of your total trading capital on any single trade.
To calculate your position size, you need to know:
- Your total trading capital.
- The percentage of capital you are willing to risk per trade.
- The distance in pips (or points) between your entry price and your stop-loss price.
- The value of one pip/point for the asset you are trading at your chosen position size.
Technical analysis helps you define the third point – the distance to your stop-loss – by identifying logical levels of support, resistance, or pattern invalidation.
2. Placing Stop-Loss Orders: A stop-loss order is an instruction to close your position automatically if the price moves against you to a specified level. This limits your potential loss on a trade. Technical analysis provides objective levels for placing stop-losses:
- Below a key support level (for a long trade).
- Above a key resistance level (for a short trade).
- Below the low of a bullish candlestick pattern or structure.
- Above the high of a bearish candlestick pattern or structure.
- Below the neckline of an inverse head and shoulders or double/triple bottom.
- Above the neckline of a head and shoulders or double/triple top.
- Just outside a trendline or channel boundary.
- Using volatility measures like the Average True Range (ATR) – you might place a stop-loss a certain multiple of the ATR away from your entry.
Placing your stop-loss at a technically significant level means that if the price hits your stop, the technical setup you based your trade on is likely no longer valid, making it a logical place to exit.
3. Risk-Reward Ratio: Before entering a trade, calculate the potential profit (distance from entry to take-profit target) relative to the potential loss (distance from entry to stop-loss). This is your risk-reward ratio. Aim for trades with a favorable ratio, such as 1:2 or 1:3, meaning you stand to make two or three times as much if the trade is successful as you stand to lose if it fails.
Technical analysis helps here too, by providing potential profit targets based on pattern measurements or subsequent support/resistance levels.
Even with a strategy that is profitable on paper (i.e., wins more than it loses, or has a good risk-reward ratio), poor risk management can quickly erode capital. Over-leveraging or failing to use stop-losses can lead to devastating losses on a few losing trades, regardless of your win rate.
Treat risk management as the foundation upon which your technical analysis trading rests. It’s the discipline that ensures you survive the inevitable drawdowns and are in a position to capitalize on profitable opportunities when they arise.
If you are looking for a broker that emphasizes robust trading conditions suitable for applying technical analysis strategies, especially in the Forex and CFD markets, considering options like Moneta Markets is wise. They offer competitive spreads, fast execution, and platform choices like MT4/MT5, which are essential for implementing precise entries, exits, and stop-losses based on technical levels.
Mastering Technical Analysis: The Path Forward
You have now been introduced to the fundamental building blocks of technical analysis: the core philosophy, how to read charts, identifying support and resistance, using trendlines and channels, applying moving averages and oscillators, recognizing chart patterns, understanding the role of volume, and the critical importance of integrating all this into a trading plan with solid risk management.
This is not the end of your learning journey, but rather the beginning. Technical analysis is a skill that is honed through continuous learning, practice, and adaptation. The market is a dynamic entity, and while principles remain constant, their application requires nuance and experience.
Here are some next steps as you continue to build your expertise:
- Practice Reading Charts: Look at historical charts of your chosen assets across different timeframes. Try to identify trends, support/resistance levels, patterns, and apply indicators. See how price behaved after certain signals occurred.
- Paper Trade: Use a demo account to practice your technical analysis strategy in real-time market conditions without risking actual money. This allows you to gain experience in executing your plan and seeing how your analysis holds up.
- Deepen Your Knowledge: Explore other technical indicators (e.g., Bollinger Bands, Ichimoku Kinko Hyo), different types of analysis (e.g., Elliott Wave Theory, Fibonacci sequences), and advanced chart patterns.
- Review Your Trades: Regularly review your trading journal to identify patterns in your performance. Are your losses due to poor signal identification, improper risk management, or emotional decisions? Use this feedback to refine your plan.
- Stay Disciplined: Adhere to your trading plan, even when you feel tempted to deviate based on emotion or hype. Discipline is a trader’s greatest asset.
- Manage Your Psychology: Trading involves psychological challenges, including dealing with fear and greed. Understanding your own emotional responses to winning and losing trades is crucial for maintaining discipline.
Technical analysis provides a powerful framework for understanding market behavior based on the collective actions of all participants. It offers tools to identify potential opportunities and manage risk in a systematic way. By combining these tools with a disciplined approach and robust risk management, you position yourself to navigate the complexities of the financial markets with greater confidence and potentially achieve your trading goals.
Remember, consistent profitability in trading is a marathon, not a sprint. It requires dedication, continuous learning, and the unwavering application of sound principles. We hope this guide provides a strong foundation for your technical analysis journey. Now, the charts await your analysis!
| Chart Type | Information Provided | Best Use |
|---|---|---|
| Line Chart | Basic trend overview | Long-term trends |
| Bar Chart | OHLC data | Detailed price action |
| Candlestick Chart | Visual price action with sentiment | Pattern identification |
october 4 blackout redditFAQ
Q:What is technical analysis?
A:Technical analysis is the study of past market data, primarily price and volume, to forecast future price movements.
Q:What are support and resistance levels?
A:Support levels are price levels where buying interest is strong enough to prevent the price from falling further, while resistance levels are where selling interest prevents the price from rising further.
Q:How can I confirm signals in technical analysis?
A:Signals can be confirmed through various indicators like volume analysis, trendlines, and chart patterns to increase the likelihood of successful trades.
“`
發佈留言
很抱歉,必須登入網站才能發佈留言。